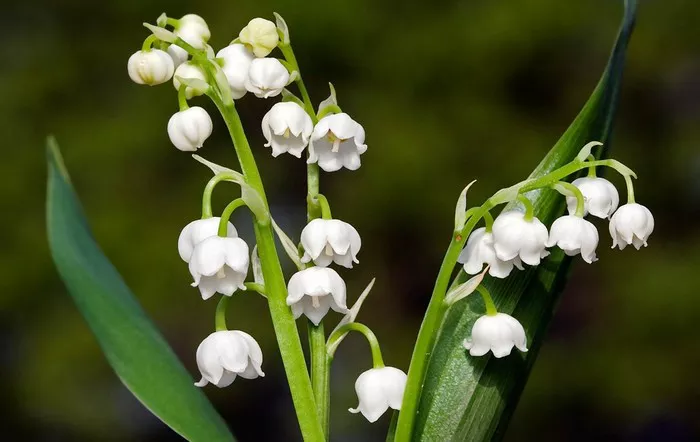
Paper crafting offers a delightful way to express creativity and produce stunning decorative pieces. Among the plethora of possibilities, crafting paper flowers stands out for its elegance and versatility. In this comprehensive guide, we delve into the art of making paper lily of the valley, renowned for its delicate appearance and symbolic significance. Whether you’re a seasoned crafter or a beginner, follow along as we explore the materials needed and step-by-step instructions to bring these enchanting blooms to life.
Materials Needed
1. Crepe Paper: Select high-quality crepe paper in white and green shades. The crepe texture adds depth and realism to the petals and leaves.
2. Floral Wire: Use floral wire to create sturdy stems for your paper lily of the valley. Opt for thin gauge wire for delicate stems.
3. Floral Tape: Floral tape is essential for securing the paper petals and leaves to the wire stems. It provides a natural finish and holds everything in place.
4. Scissors: Sharp scissors are necessary for precise cutting of the crepe paper and floral wire.
5. Craft Glue: Choose a clear-drying craft glue that bonds well with paper. A fine-tipped applicator is helpful for precise glue application.
6. Pencil and Eraser: These basic drawing tools are useful for tracing and sketching the shapes of petals and leaves.
7. Wire Cutters: Wire cutters are essential for trimming floral wire to the desired lengths.
8. Template: Optionally, you can create or obtain a template to guide the shaping and cutting of the paper components. Templates provide consistency and accuracy in crafting.
Step-by-Step Guide
Step 1: Prepare Your Workspace
Before diving into the crafting process, set up a clean and spacious workspace. Ensure you have all the necessary materials within reach. Lay down a protective covering on your work surface to prevent any mess or damage.
Step 2: Cut Petal Shapes
Begin by cutting out petal shapes from the white crepe paper. The lily of the valley typically has small, bell-shaped petals. You can either freehand the shapes or use a template for accuracy. Each flower will require several petals, so cut an ample quantity to create a full bloom.
Step 3: Form Petals
Once you have cut out the petal shapes, gently stretch and manipulate the crepe paper to give the petals a natural curve. Use your fingers to shape the edges of the petals, creating a slightly ruffled appearance. This adds realism and depth to the flower.
Step 4: Construct the Flower
To assemble the lily of the valley flower, take a piece of floral wire and bend it into a small hook at one end. This will serve as the anchor for the petals. Apply a small amount of craft glue to the base of a petal and carefully attach it to the hooked end of the wire. Continue adding petals around the wire, overlapping them slightly to create a layered effect.
Step 5: Create Leaves
Next, cut out leaf shapes from the green crepe paper. Lily of the valley leaves are elongated and taper to a point. Use a template or freehand the shapes, ensuring variation in size for realism. Like the petals, gently stretch and shape the leaves to add texture.
Step 6: Attach Leaves to Stems
Once you have prepared the leaves, it’s time to attach them to the floral wire stems. Apply a small amount of craft glue to the base of each leaf and carefully wrap it around the stem. Position the leaves at intervals along the stem, alternating sides for a natural appearance.
Step 7: Wrap Stems with Floral Tape
To finish the stems and secure the petals and leaves in place, wrap them with floral tape. Start at the base of the flower and carefully wind the tape around the wire, working your way down to the end of the stem. Ensure the tape is snug to provide stability and a polished finish.
Step 8: Shape and Arrange
Once you have assembled the flowers and attached them to stems, take a moment to shape and arrange them to your liking. Gently bend the stems to create natural curves and adjust the position of the petals and leaves for balance and symmetry.
Step 9: Display Your Creation
Your paper lily of the valley is now complete and ready to be displayed. Arrange the flowers in a vase or use them to embellish gifts, cards, or other craft projects. The delicate beauty of these paper blooms will add a touch of elegance to any setting.
Step 10: Experiment and Enjoy
Don’t be afraid to experiment with different techniques and variations to customize your paper lily of the valley. Try using different shades of crepe paper, varying the size and shape of the petals, or adding subtle details such as veining or shading with colored pencils. Let your creativity flourish as you explore the art of paper flower crafting.
Conclusion
Crafting paper lily of the valley is a rewarding and enjoyable process that allows you to bring the beauty of nature into your home all year round. By following this step-by-step guide and using simple materials, you can create stunningly realistic flowers that capture the essence of these beloved blooms. Whether you’re crafting for pleasure or special occasions, the timeless elegance of paper lily of the valley is sure to impress and delight.


