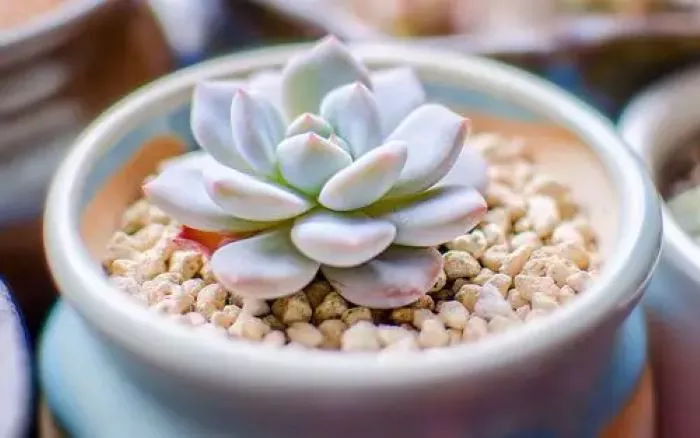
Fleshy pruning refers to the practice of trimming succulent plants to promote healthy growth, improve aesthetics, and propagate new plants. Succulents are known for their thick, fleshy leaves and stems that store water, making them resilient and beautiful additions to gardens and indoor spaces. However, over time, these plants may become leggy or overcrowded, necessitating pruning and replanting. This article will guide you through the process of replanting fleshy prunings, ensuring that you can propagate new plants successfully and maintain the health of your existing succulents.
Understanding Fleshy Pruning
Fleshy pruning involves cutting back parts of succulent plants to encourage new growth. This technique can help rejuvenate overgrown plants, remove dead or damaged leaves, and create a more aesthetically pleasing shape. It is also an effective method for propagating new plants from the cuttings. When done correctly, fleshy pruning can enhance the overall health and appearance of succulents.
When to Prune Succulents
The best time to prune succulents is during their active growing season, typically in spring or early summer. During this period, succulents are more likely to recover quickly from pruning and may produce new growth more readily. Avoid pruning during the winter months when the plants are dormant, as this can stress the plant and hinder recovery.
Tools Needed for Pruning
Before you begin the pruning process, gather the necessary tools. You will need:
- Sharp, clean pruning shears or scissors
- A clean cutting board or surface
- Rubbing alcohol or a disinfectant to sterilize tools
- A small pot with drainage holes for replanting
- Well-draining potting mix suitable for succulents
- Optional: Rooting hormone to encourage root development
Steps for Pruning and Replanting Fleshy Cuttings
Step 1: Prepare Your Tools
Start by sterilizing your pruning tools. Wipe the blades with rubbing alcohol to prevent the transfer of diseases between plants. Clean tools will ensure that your succulents remain healthy during the pruning process.
Step 2: Select the Right Plant
Choose a healthy succulent that requires pruning. Look for signs of overgrowth, such as leggy stems or crowded leaves. Ensure that the plant is in good condition and free from pests or diseases.
Step 3: Make the Cuts
Using your sterilized shears, carefully cut off the desired sections of the plant. For fleshy prunings, aim to take cuttings that are several inches long with at least a few healthy leaves attached. Make clean cuts to minimize damage to the plant.
Step 4: Allow Cuttings to Callus
After making the cuts, place the cuttings in a dry, shaded area for a few days. This allows the cut ends to callus over, which helps prevent rot when they are planted. Ensure that the cuttings are not exposed to direct sunlight during this time, as this can cause them to dry out too quickly.
Step 5: Prepare the Pot and Soil
While the cuttings are callusing, prepare your pot and soil. Choose a small pot with drainage holes to prevent waterlogging. Fill the pot with a well-draining potting mix designed for succulents. You can create your own mix by combining regular potting soil with sand or perlite for improved drainage.
Step 6: Plant the Cuttings
Once the cuttings have callused, it is time to plant them. Make small holes in the soil with your finger or a pencil. Place the cut end of each cutting into the hole and gently press the soil around it to secure it in place. If you are using rooting hormone, dip the cut end of the cutting into the hormone before planting.
Step 7: Water Sparingly
After planting, do not water the cuttings immediately. Allow them to settle into their new environment for about a week. After this period, lightly mist the soil or water it sparingly. It is crucial to keep the soil slightly moist but not soggy. Overwatering can lead to rot, especially for newly planted cuttings.
Step 8: Provide Proper Light Conditions
Place the newly planted cuttings in a location with bright, indirect light. Avoid direct sunlight, which can scorch the cuttings. Gradually acclimate them to brighter conditions over time. This will encourage healthy growth without stressing the plants.
Step 9: Monitor Growth
Over the next few weeks, monitor the cuttings for signs of new growth. You may notice small leaves or roots developing. Be patient, as it can take several weeks for cuttings to establish themselves. Continue to provide adequate light and water, adjusting as needed based on the conditions.
Caring for Newly Planted Cuttings
Once your cuttings have established roots and new growth, you can care for them as you would with any other succulent. Here are some tips for ongoing care:
Watering: Water the plants thoroughly when the top inch of soil is dry. Ensure that excess water can drain away to prevent rot.
Light: Continue to provide bright, indirect light. If the plants begin to stretch or become leggy, they may need more light.
Fertilizing: Start fertilizing with a diluted succulent fertilizer during the growing season. This will provide the nutrients needed for healthy growth.
Repotting: As the plants grow, they may outgrow their pots. Repot them into larger containers as needed, using fresh potting mix.
Conclusion
Replanting fleshy prunings is a rewarding process that allows you to rejuvenate your succulents and propagate new plants. By following the steps outlined in this article, you can successfully prune and replant your succulents, ensuring they remain healthy and vibrant. With proper care, your newly planted cuttings will thrive and bring beauty to your home or garden. Embrace the art of fleshy pruning and enjoy the satisfaction of cultivating your succulent collection.


