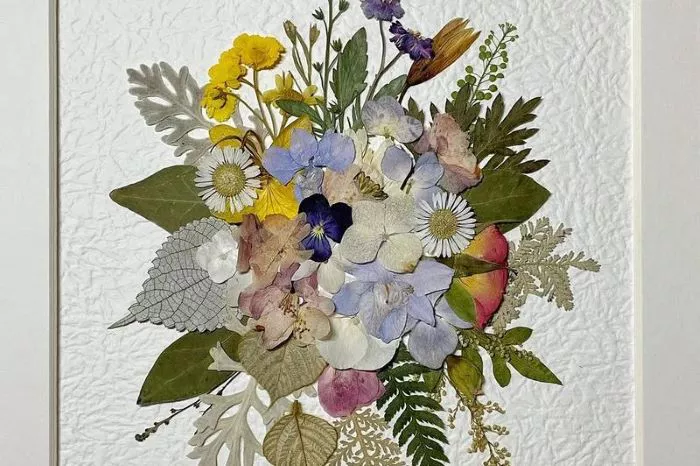
Pressing flowers is a delightful way to preserve their beauty and create lasting memories. One of the quickest and most effective methods for pressing flowers is using a microwave. This technique allows you to dry flowers rapidly while maintaining their vibrant colors and delicate shapes. This article will provide a detailed guide on how to press flowers in the microwave, ensuring a successful and enjoyable experience.
Understanding the Microwave Flower Pressing Method
Microwave flower pressing works by using heat to evaporate moisture from the flowers. This method is popular because it significantly reduces the time required for traditional pressing methods, which can take weeks. With the microwave technique, you can achieve beautifully pressed flowers in just a few minutes. The key is to use the right materials and follow the steps carefully to avoid damaging the flowers.
Choosing the Right Flowers
Not all flowers are suitable for microwave pressing. The best candidates are flat, low-moisture flowers that can withstand the drying process. Ideal choices include pansies, violets, daisies, and small ferns. Avoid thick or fleshy flowers like roses or peonies, as they may not dry properly and could become mushy.
Collect your flowers when they are fresh and in full bloom. The best time to gather flowers is in the early morning or late afternoon when they are less likely to be wilted. Select blooms that are free from blemishes and pests to ensure the best results.
Materials Needed for Microwave Pressing
To press flowers in the microwave, you will need the following materials
Fresh flowers
Two pieces of absorbent paper towels or blotting paper
Two ceramic tiles or microwave-safe plates
A microwave
A heavy object (optional for added weight)
These materials are easily accessible and will help you achieve the best results in the microwave pressing process.
Step-by-Step Guide to Pressing Flowers in the Microwave
Prepare the Flowers
Begin by preparing your flowers. Trim the stems to a length of about one to two inches. Remove any leaves or unwanted parts that may interfere with the pressing process. Choose flowers that are flat and delicate to ensure even drying.
Arrange the Flowers
Place one piece of absorbent paper towel on a flat surface. Arrange the flowers on top of the paper towel, ensuring they are not overlapping. This allows for even drying and prevents the flowers from sticking together.
Cover the Flowers
Place the second piece of absorbent paper towel over the flowers. This will help absorb moisture and protect the flowers during the microwaving process.
Add Weight (Optional)
If desired, you can place a ceramic tile on top of the paper towel covering the flowers. This will apply even pressure and help flatten the flowers further. However, this step is optional, as the microwave’s heat will also help in the pressing process.
Microwave the Flowers
Place the ceramic tiles or plates with the flowers in the microwave. Set the microwave to a low power setting, typically around 30 to 50 percent power. Start with a short interval of 30 seconds.
Check the Flowers
After the initial 30 seconds, carefully open the microwave and check the flowers. Be cautious, as the tiles or plates may be hot. If the flowers are not fully dried, continue microwaving in 10 to 15-second increments. Check the flowers after each interval to avoid overheating, which can damage the flowers.
Cool the Flowers
Once the flowers are dry, remove them from the microwave and let them cool for a few minutes. The flowers may be fragile, so handle them gently during this process.
Remove and Store the Flowers
Carefully lift the top paper towel to reveal the pressed flowers. If they are still slightly damp, you can place them back in the microwave for a few more seconds. Once fully dry, store the pressed flowers in a cool, dark place, or use them immediately in your crafts.
Tips for Successful Microwave Flower Pressing
Use fresh flowers for the best results. Flowers that are past their prime may not press well.
Experiment with different types of flowers to see which ones work best for your projects.
Keep an eye on the flowers while microwaving to prevent burning or overheating.
If you are pressing multiple flowers at once, make sure they are arranged in a single layer to allow for even drying.
Using Pressed Flowers in Crafts
Once you have successfully pressed your flowers, the possibilities for creative projects are endless. Pressed flowers can be used in scrapbooking, card making, or as decorative elements in home decor. You can glue them onto paper or canvas to create beautiful art pieces.
Another popular use for pressed flowers is in resin art. By embedding pressed flowers in resin, you can create unique coasters, jewelry, or decorative items. The contrast between the flowers and the resin creates stunning visual effects.
If you enjoy making personalized gifts, consider using pressed flowers to create bookmarks or framed art. The beauty of pressed flowers adds a special touch to any project.
Conclusion
Pressing flowers in the microwave is a quick and effective method that allows you to preserve the beauty of nature in just a few minutes. By selecting the right flowers and following the steps outlined in this article, you can create stunning pressed flower art. Whether used in crafts or as decorative elements in your home, pressed flowers serve as a lasting reminder of the beauty of the natural world. Embrace the art of microwave flower pressing and let your creativity bloom.


