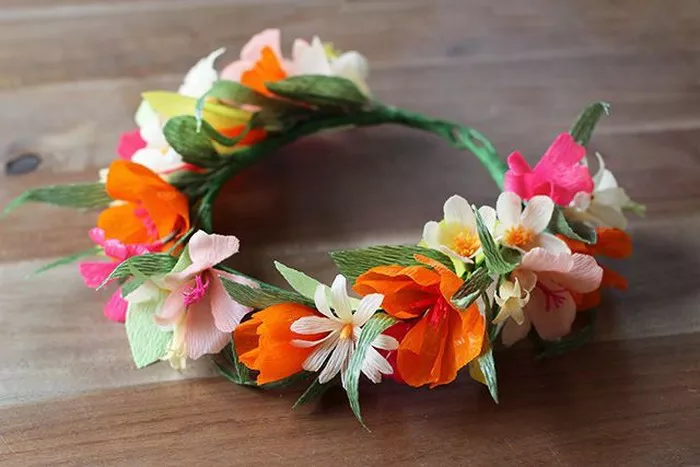
Floral accessories have been a timeless and versatile addition to fashion, and paper flower crowns have emerged as a popular trend for various occasions. These whimsical creations not only add a touch of nature-inspired elegance but also allow for personalization and creativity. In this comprehensive guide, we will walk you through the process of making a beautiful paper flower crown effortlessly.
Materials You’ll Need:
Before diving into the crafting process, gather the following materials:
1. Colored craft paper
2. Floral wire or a pre-made wire crown base
3. Pencil
4. Scissors
5. Craft glue or hot glue gun
6. Template for flower shapes (optional)
7. Ribbon or elastic cord
8. Beads or additional embellishments (optional)
Step 1: Choose Your Paper and Colors
Selecting the right paper is crucial for the overall look of your paper flower crown. Opt for high-quality craft paper in a variety of colors that complement each other. Consider the theme or occasion for which you are creating the crown, and choose colors accordingly.
Step 2: Design Your Flower Templates
While some crafters prefer freehand cutting, using templates can help ensure consistency in your flower shapes. You can find various templates online or design your own. Draw different flower shapes on the colored craft paper and cut them out. Experiment with sizes and petal shapes for variety.
Step 3: Cut Out Your Flowers
Place the flower templates on the chosen craft paper and carefully cut around them. Repeat this step until you have a sufficient number of flowers for your crown. Remember, a variety of sizes and shapes will add dimension to your finished product.
Step 4: Create the Flower Centers
To add a realistic touch to your paper flowers, consider adding centers. You can cut small circles from a contrasting color of craft paper or use beads, sequins, or even small pom-poms. Glue these centers to the middle of each flower.
Step 5: Shape the Flowers
Give your flowers dimension by gently curling the petals with your fingers or using a pencil to curl them outward. This step adds a lifelike quality to your paper flowers.
Step 6: Prepare the Crown Base
If you’re not using a pre-made wire crown base, create one using floral wire. Measure the wire around your head, leaving a little extra for adjustment, and form a circle. Twist the ends together securely to complete the base.
Step 7: Attach the Flowers to the Crown Base
Using craft glue or a hot glue gun, carefully attach the prepared paper flowers to the crown base. Start with the larger flowers at the center and gradually add smaller ones towards the ends. Ensure that the flowers are evenly spaced for a balanced look.
Step 8: Add Leaves and Additional Elements (Optional)
To enhance the natural look of your paper flower crown, consider adding paper leaves between the flowers. You can also incorporate other elements like tiny butterflies or vines. Be creative, but keep in mind not to overcrowd the crown.
Step 9: Secure the Ends of the Crown
Once you’ve completed attaching all the flowers and additional elements, secure the ends of the crown base. If you’re using a wire base, twist the ends together tightly. If you opted for a pre-made crown base, follow the manufacturer’s instructions for securing it.
Step 10: Customize the Fit
Try on your paper flower crown and adjust the fit as needed. If you’re using a wire base, you can gently reshape it to better match the contour of your head. For added comfort, attach a ribbon or elastic cord to the ends of the crown and tie it around your head.
Step 11: Add Final Touches (Optional)
Enhance the overall aesthetic of your paper flower crown by adding final touches like glitter, rhinestones, or additional embellishments. This step allows you to personalize your creation and make it truly unique.
Step 12: Display and Preserve Your Paper Flower Crown
Once your paper flower crown is complete, showcase it proudly at weddings, parties, or any special event. To preserve its beauty, store it in a cool, dry place away from direct sunlight. If stored properly, your paper flower crown can be a lasting memento of a memorable occasion.
Conclusion
Creating a stunning paper flower crown is an enjoyable and rewarding DIY project that allows you to express your creativity. With a few simple materials and a bit of patience, you can produce a unique accessory that adds a touch of natural beauty to any outfit. Whether for a wedding, festival, or a casual day out, your handmade paper flower crown is sure to make a lasting impression. So, gather your supplies and let your imagination bloom as you embark on this delightful crafting journey.


