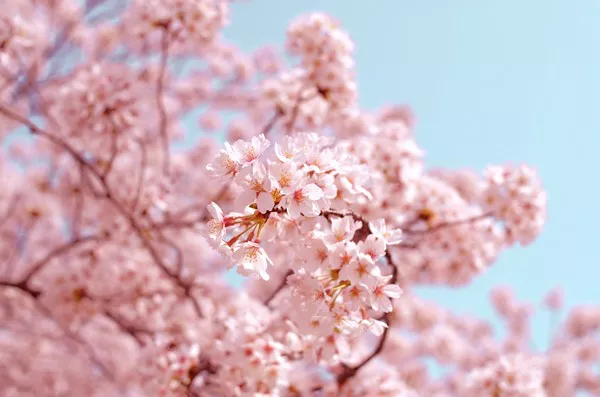
Paper sakura flowers, or cherry blossoms, are a beautiful and delicate craft that captures the essence of spring. These flowers are not only a lovely addition to home décor but also a delightful project for crafters of all ages. In this comprehensive guide, we will walk you through the materials needed and provide a step-by-step guide to creating your own paper sakura flowers. Whether you’re a seasoned crafter or a beginner looking for a new project, this guide will help you create stunning paper sakura flowers that will brighten any space.
Materials Needed
Before diving into the crafting process, it’s essential to gather all the necessary materials. Here is a comprehensive list of what you will need to make paper sakura flowers:
- Colored Paper: Typically, light pink and white are used to mimic the natural colors of sakura, but you can choose any color you prefer.
- Green Paper: For the leaves and stems.
- Scissors: Sharp scissors are essential for precise cuts.
- Glue: A strong craft glue or a hot glue gun.
- Pencil: For tracing patterns.
- Ruler: To ensure accurate measurements.
- Templates: Optional, but useful for consistency.
- Wire: Floral wire for the stems.
- Tape: Floral tape or any green tape for covering the stems.
- Paintbrush: Optional, for adding details.
- Pastel Chalk or Paint: To add color and details to the petals.
Step-by-Step Guide
Step 1: Preparing the Petals
1. Choose Your Paper:
Select the colored paper you will use for the petals. Light pink and white are traditional choices for sakura blossoms, but feel free to experiment with different colors.
2. Create Templates:
Draw petal shapes on a piece of cardboard to create templates. Sakura petals are typically teardrop-shaped with a slight curve. You will need three to five petals per flower.
3. Trace and Cut:
Use your templates to trace petal shapes onto the colored paper. Carefully cut out each petal with sharp scissors. For a more natural look, cut some petals slightly larger or smaller than others.
4. Shape the Petals:
To give the petals a realistic appearance, gently curve them. You can do this by wrapping the paper around a pencil or by lightly curling the edges with your fingers. For a more textured look, crinkle the petals slightly.
Step 2: Assembling the Flower
1. Create the Flower Center:
Cut a small strip of yellow or white paper. Fringe the strip by making small cuts along one edge, then roll it tightly to form the flower center (stamen). Secure it with glue.
2. Attach Petals to the Center:
Apply a small amount of glue to the base of each petal and attach them around the flower center. Overlap the petals slightly to create a full, layered look. Hold each petal in place until the glue sets.
3. Add Additional Layers:
For a more realistic and fuller flower, add a second or third layer of petals. Position the additional layers so that the petals are staggered between the ones below them.
Step 3: Creating the Stem and Leaves
1. Prepare the Wire:
Cut a piece of floral wire to the desired length for the stem. If you want a sturdier stem, twist two pieces of wire together.
2. Cover the Stem:
Wrap the floral wire with green floral tape or green paper to create the stem. Start at the top and work your way down, making sure the wire is completely covered.
3. Attach the Flower to the Stem:
Apply a small amount of glue to the base of the flower and attach it to the top of the wrapped wire. Hold it in place until the glue sets.
4. Create and Attach Leaves:
Cut leaf shapes from green paper. Make a small slit at the base of each leaf and slide the wire through the slit. Secure the leaves in place with glue. Position the leaves along the stem as desired.
Step 4: Adding Finishing Touches
1. Detail the Petals:
Use pastel chalks or paint to add subtle details and shading to the petals. Lightly brush the edges of the petals with a contrasting color to give them depth and realism.
2. Shape and Arrange:
Gently adjust the petals and leaves to give the flower a natural, lifelike appearance. Bend the wire stem slightly to create a more organic shape.
3. Create a Bouquet:
To make a bouquet, repeat the above steps to create multiple sakura flowers. Arrange them together in a vase or tie them with a ribbon for a charming floral display.
Tips for Success
1. Experiment with Colors: While traditional sakura flowers are pink and white, don’t be afraid to experiment with different colors to create unique and personalized flowers.
2. Use Quality Materials: High-quality paper and glue will result in more durable and attractive flowers.
3. Be Patient: Crafting delicate paper flowers takes time and precision. Take your time to ensure each petal and leaf is carefully cut and shaped.
4. Practice Makes Perfect: Don’t be discouraged if your first few attempts aren’t perfect. Practice will improve your technique and result in more beautiful flowers.
Conclusion
Making paper sakura flowers is a rewarding and enjoyable craft that allows you to bring the beauty of cherry blossoms into your home all year round. By following this step-by-step guide, you can create stunning and realistic paper flowers that will impress and delight. Whether you use them to decorate your home, give as gifts, or simply enjoy the crafting process, these paper sakura flowers are sure to bring a touch of springtime beauty to any setting. So gather your materials, take your time, and let your creativity bloom.


