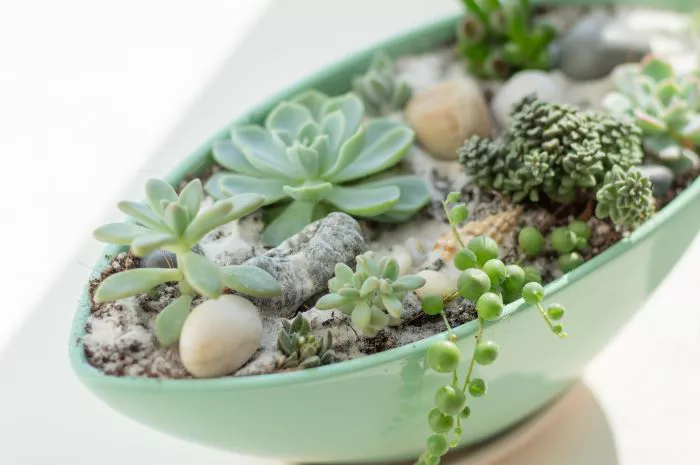
Succulents are popular for their unique shapes, vibrant colors, and low maintenance requirements. One of the most rewarding aspects of growing succulents is propagating them from cuttings. Rooted succulent cuttings are easy to plant and can quickly develop into beautiful, thriving plants. This article will provide a comprehensive guide on how to plant rooted succulent cuttings, ensuring successful growth and development.
Understanding Succulent Cuttings
Succulent cuttings are sections of a plant that can grow roots and develop into new plants. Propagation through cuttings is a common method for many succulent species. This technique allows gardeners to expand their collections and share plants with others. Rooted cuttings have already developed a root system, making the planting process straightforward.
Choosing the Right Container
The first step in planting rooted succulent cuttings is selecting the appropriate container. Choose a pot with drainage holes to prevent water from accumulating at the bottom. Terracotta pots are an excellent choice because they are porous and allow for air circulation. If you prefer plastic pots, ensure that they have adequate drainage.
The size of the container should be appropriate for the cutting. A small pot is usually sufficient, as it allows the roots to establish without excess soil that retains moisture.
Preparing the Soil
Succulents require well-draining soil to thrive. A commercial cactus or succulent mix is ideal, as it is specifically formulated to provide excellent drainage. If you prefer to create your own soil mix, combine regular potting soil with perlite, coarse sand, or pumice. This combination will enhance drainage and aeration, preventing root rot.
Before planting, ensure that the soil is dry. If you are using soil that has been previously watered, allow it to dry out completely. This step is crucial to avoid overwatering the cutting.
Planting the Rooted Cutting
Once you have chosen the container and prepared the soil, it is time to plant the rooted cutting. Follow these steps for successful planting
Fill the Container
Fill the container with the prepared soil, leaving about an inch of space at the top. Gently tap the pot to settle the soil without compacting it too much.
Create a Hole for the Cutting
Use your finger or a small tool to create a hole in the center of the soil. The hole should be deep enough to accommodate the roots of the cutting without bending or crowding them.
Place the Cutting in the Hole
Carefully remove the rooted cutting from its previous container. Hold the cutting by the base, avoiding damage to the roots. Place the cutting in the hole you created, ensuring that the roots are spread out and not crammed together.
Cover the Roots
Gently fill the hole with soil, making sure to cover the roots completely. Lightly press the soil around the base of the cutting to provide stability. Be careful not to bury the leaves, as this can lead to rot.
Watering the Cutting
After planting, it is essential to water the cutting properly. Use a spray bottle or a watering can with a fine spout to lightly mist the soil. Avoid soaking the soil at this stage, as the cutting is still establishing itself. Allow the soil to dry out completely before watering again.
Providing the Right Conditions
After planting, it is crucial to provide the right conditions for the rooted cutting to thrive. Here are some key factors to consider
Light Requirements
Succulents prefer bright, indirect sunlight. Place the newly planted cutting in a location that receives ample light without direct exposure to harsh midday sun. If you are growing indoors, a south or west-facing window is ideal. If natural light is insufficient, consider using grow lights to supplement their light needs.
Temperature and Humidity
Succulents thrive in warm, dry conditions. They prefer temperatures between 65 and 80 degrees Fahrenheit. Avoid placing them in areas with extreme temperature fluctuations or high humidity, as this can lead to stress and disease.
Monitoring Growth
After planting, monitor the cutting for signs of growth. Rooted cuttings may take a few weeks to establish themselves, during which time they may not show much visible growth. Be patient and continue to provide proper care.
As the cutting begins to grow, you may notice new leaves developing. This is a positive sign that the plant is adapting to its new environment. Continue to provide bright light and water only when the soil is dry.
Common Issues and Solutions
While planting rooted succulent cuttings is generally straightforward, issues can arise. Here are some common problems and how to address them
Overwatering
One of the most common issues with succulents is overwatering. Signs of overwatering include yellowing leaves, mushy stems, and a foul odor from the soil. If you notice these signs, allow the soil to dry out completely. In severe cases, you may need to repot the cutting in fresh, dry soil.
Underwatering
Conversely, underwatering can also be problematic. If the leaves appear shriveled or wrinkled, the plant may need water. Water the cutting thoroughly, allowing excess water to drain out. Ensure that the soil is dry before the next watering.
Pests
Inspect your succulent regularly for pests such as mealybugs or aphids. If you notice any signs of infestation, treat the plant with insecticidal soap or neem oil. Be sure to follow the product instructions for safe application.
Conclusion
Planting rooted succulent cuttings is a rewarding and enjoyable process that allows you to expand your plant collection. By following the steps outlined in this article, you can successfully plant and care for your succulent cuttings. With proper attention to light, watering, and soil conditions, your rooted cuttings will thrive and grow into beautiful, healthy plants.
Succulents are not only visually appealing but also serve as a reminder of the beauty of nature. Enjoy the journey of nurturing your succulent cuttings, and watch as they flourish in their new home.


