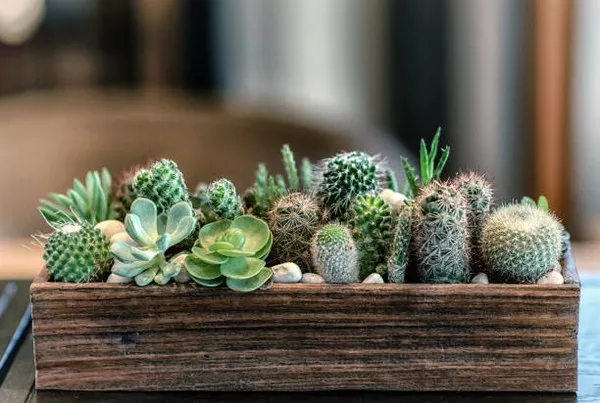
Little Jewel succulents (Sedum rubrotinctum) are captivating plants with their vibrant, bead-like leaves and easy-care nature. Propagating these delightful succulents allows you to expand your collection, share them with friends, or replace mature plants that have grown leggy or damaged. In this comprehensive guide, we will explore the step-by-step process of propagating Little Jewel succulents through various methods. Additionally, we will cover essential care tips for both parent and propagated plants, ensuring successful growth and an abundance of these charming succulents.
1. Understanding Little Jewel Succulents
Little Jewel succulents, also known as Jelly Bean or Pork and Beans, are native to Mexico and form clusters of colorful, jelly bean-shaped leaves. These fleshy, rounded leaves range in hues from lime green to deep red, depending on light exposure and environmental conditions. As they grow, they develop tiny, star-shaped yellow flowers that add to their appeal.
2. Propagation Methods for Little Jewel Succulents
There are several methods to propagate Little Jewel succulents, each offering its advantages and suiting different preferences:
Leaf Cutting Propagation: This method involves removing individual leaves from the parent plant and allowing them to develop into new succulents.
Stem Cutting Propagation: Stem cuttings involve taking sections of the stem from the parent plant and encouraging them to root and grow into new plants.
Offsets or Pups Propagation: Little Jewel succulents produce offsets or pups that can be separated and replanted as individual plants.
3. Step-by-Step Guide for Leaf Cutting Propagation
Selecting Healthy Leaves: Choose plump, healthy leaves from the parent plant for propagation. Gently twist the leaves off the stem, ensuring you keep the entire leaf intact.
Callus Formation: Place the leaf cuttings in a dry and well-ventilated area for a day or two to allow calluses to form at the base of the leaves. Callusing helps prevent rot when the leaves are planted.
Planting the Leaves: Once the leaves have callused, lay them on top of a well-draining succulent or cactus potting mix. Avoid burying the leaves entirely; instead, let them rest on the soil surface.
Root Development: Water the soil sparingly to keep it slightly moist. Avoid overwatering, as excessive moisture can lead to rot. After several weeks, roots should begin to form, and tiny plantlets will emerge from the base of the leaves.
Transplanting the Pups: Once the plantlets develop sufficient roots and grow to a decent size, gently separate them from the parent leaf and transplant them into their individual pots.
4. Step-by-Step Guide for Stem Cutting Propagation
Selecting Healthy Stem Cuttings: Using clean and sharp scissors or pruning shears, take 3-4 inch sections of healthy stems from the parent plant. Ensure the cutting has a few sets of leaves and remove any lower leaves near the base of the cutting.
Callus Formation: As with leaf cuttings, allow the stem cuttings to callus for a day or two before planting. Place them in a dry, well-ventilated area.
Planting the Stem Cuttings: Insert the callused end of the stem cuttings into a well-draining potting mix. Make sure at least one set of leaves remains above the soil level.
Root Development: Water the soil sparingly to maintain slight moisture. Roots should develop from the base of the stem cutting within a few weeks.
Transplanting Rooted Cuttings: Once the new succulents have established a healthy root system, transplant them into their individual pots.
5. Step-by-Step Guide for Offsets or Pups Propagation
Identifying Healthy Offsets: Offsets are small succulents that grow at the base of the parent plant. Look for well-developed pups with a few sets of leaves and healthy roots.
Separation from Parent: Gently remove the offsets from the parent plant using clean, sharp scissors or your hands. Be cautious not to damage the roots or the main plant.
Callus Formation (Optional): Some gardeners prefer to allow the cut surfaces of the offsets to callus for a day before planting, though this step is not mandatory.
Planting the Offsets: Place the offsets in a well-draining potting mix, ensuring the roots are buried and the leaves sit above the soil surface.
Root Establishment: Water the soil sparingly and provide the offsets with bright, indirect light to encourage root growth.
6. Essential Care Tips for Parent and Propagated Little Jewel Succulents
Light Requirements: Little Jewel succulents prefer bright, indirect sunlight. Placing them near a south-facing window indoors or providing filtered sunlight outdoors is ideal.
Watering: Allow the soil to dry out completely between waterings. Overwatering can lead to root rot and other issues.
Well-Draining Soil: Use a well-draining succulent or cactus potting mix to ensure proper aeration and moisture control.
Temperature: Little Jewel succulents thrive in moderate temperatures between 65°F to 75°F (18°C to 24°C). Protect them from extreme cold or heat.
Fertilization: Feed the parent plant and propagated succulents with a diluted liquid fertilizer formulated for succulents during their active growing season.
Conclusion
Propagating Little Jewel succulents is an enjoyable and rewarding process that allows you to cultivate an abundant collection of these charming plants. Whether you choose leaf cuttings, stem cuttings, or offsets for propagation, following the step-by-step guides and essential care tips will lead to successful growth and healthy, vibrant succulents. As you expand your collection and share your propagated plants with others, you’ll find joy in nurturing these captivating Little Jewel succulents for years to come.


