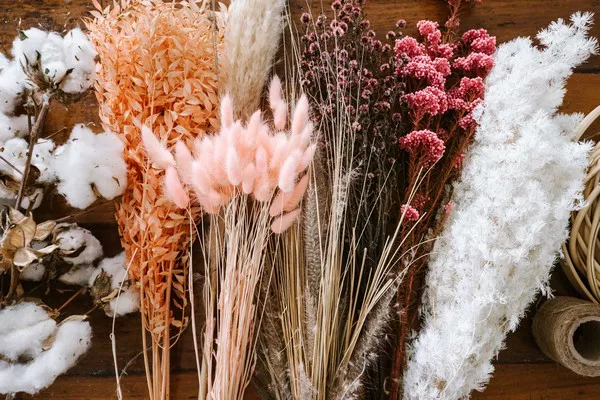
Flowers have long captivated human senses with their vibrant colors, delicate forms, and enchanting fragrances. From momentous occasions to everyday moments, flowers play a significant role in our lives. Preserving these ephemeral beauties has been a pursuit of florists, artists, and nature enthusiasts for centuries. One innovative method that has gained popularity in recent years is preserving flowers using a microwave. This article aims to provide a comprehensive guide to this technique, ensuring that your cherished blossoms can be enjoyed for an extended period.
The Science Behind Microwave Flower Preservation
Microwave flower preservation is a modern technique that utilizes the power of microwave radiation to remove moisture from flowers while maintaining their shape and color. The process leverages the principles of moisture evaporation and heat distribution. As microwaves pass through the petals, they excite water molecules, causing them to evaporate. This controlled moisture removal prevents decay and helps the flowers retain their natural beauty.
Step-by-Step Guide to Microwave Flower Preservation
Preserving flowers using a microwave requires careful attention to detail and a methodical approach. Here’s a step-by-step guide to help you achieve optimal results:
1. Selection of Flowers
Choose flowers that are at their peak freshness and have just begun to open. Roses, daisies, and carnations are popular choices due to their sturdy petals and vibrant colors.
2. Preparation
Trimming: Remove excess leaves and foliage from the stem. Trim the stem to your desired length, considering the container you plan to display the preserved flower in.
Desiccant Selection: Silica gel or sand can be used as desiccants. Silica gel is preferred for its high absorption capacity and reusability.
Desiccant Container: Select a microwave-safe container that is deep enough to accommodate the flower and desiccant while providing a few inches of space above the flower.
3. Desiccation Process
Fill the Container: Pour a layer of desiccant at the bottom of the container.
Position the Flower: Place the flower upright on the desiccant bed, ensuring it is not touching the sides of the container.
Cover with Desiccant: Gently pour more desiccant over and around the flower, making sure it is completely covered without bending or damaging the petals.
4. Microwave Drying
Microwave Wattage: Adjust the microwave power to a low setting, typically around 30% to 40% of its maximum power.
Microwave Intervals: Microwave the flower in short intervals, usually 20 to 30 seconds, to prevent overheating. Check the flower’s progress after each interval.
Cooling Periods: Allow the container to cool for a minute or two between intervals. This helps prevent any moisture from reabsorbing into the flower.
5. Inspection and Preservation
Check Dryness: To ensure the flower is adequately dried, gently touch the petals. They should feel dry and papery to the touch.
Sealing: Once dried, carefully remove the flower from the desiccant and place it in an airtight container. Adding a small packet of silica gel can help maintain dry conditions.
Tips for Successful Microwave Flower Preservation
Achieving optimal results in microwave flower preservation requires attention to detail and a few expert tips:
1. Patience: Rushing the process can lead to uneven drying or petal damage. Take your time and follow the recommended intervals.
2. Microwave Power: Always use a low microwave power setting to prevent overheating and scorching the flowers.
3. Flower Condition: Choose flowers that are in excellent condition, as any imperfections will become more pronounced after preservation.
4. Trial and Error: Different flower types and microwave models may require slight adjustments to the drying process. Experimentation will help you refine your technique.
Pressing and Air Drying
Microwave preservation is just one method of preserving flowers. Here are two other popular techniques:
1. Pressing Flowers
Pressing flowers involves placing them between absorbent materials and applying pressure to remove moisture. The flattened flowers can be used in crafts, art, or as decorations. To press flowers:
Place the flower between two sheets of absorbent paper.
Place heavy books or press boards on top of the paper layers.
Allow the flowers to dry for several weeks, replacing the absorbent paper as needed.
2. Air Drying Flowers
Air drying is a traditional method that involves hanging flowers upside down in a dry, dark place. This technique is suitable for flowers with sturdy stems and petals, such as lavender and statice. To air dry flowers:
Tie a bunch of flowers together with a rubber band or string.
Hang them upside down in a well-ventilated, dark area.
Allow the flowers to dry for several weeks until they feel crisp to the touch.
Conclusion
Preserving flowers using a microwave is a rewarding endeavor that allows you to capture the essence of fleeting beauty. By understanding the science behind the technique and following the detailed steps, you can extend the life of your favorite blossoms and create lasting memories. Whether you choose microwave preservation, pressing, or air drying, each method offers a unique way to celebrate the delicate wonders of the natural world. So, gather your blooms, put your knowledge to practice, and revel in the art of preserving flowers.


