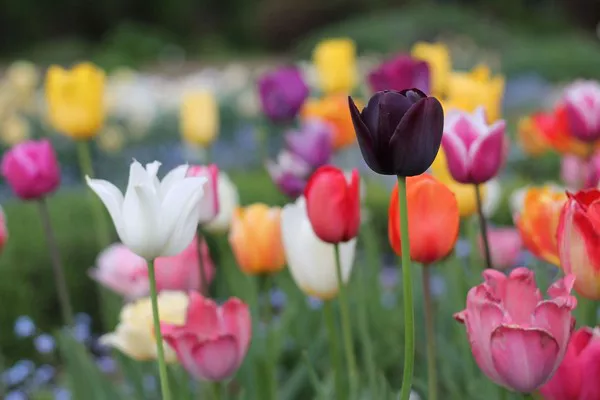
Tulip flowers, with their vibrant colors and elegant shapes, are a symbol of springtime beauty and renewal. Growing these stunning blooms at home can be a gratifying experience, even for novice gardeners. This comprehensive guide will provide you with the essential knowledge needed to cultivate tulips successfully, covering topics from selecting the right tulip varieties to caring for them throughout their growth cycle.
Choosing the Ideal Tulip Varieties
The world of tulips offers a plethora of options, each boasting distinct characteristics. Selecting the right tulip varieties is crucial to ensure a successful and visually appealing display. Consider the following points:
1. Early, Mid, or Late Season Varieties
Tulips are categorized into early, mid, and late-season bloomers. Plan your garden with a mix of these varieties to extend the flowering period and enjoy a continuous display of colors.
2. Color Palette and Shape
Tulips come in an array of colors and shapes, from classic single blooms to striking parrot tulips. Decide on the color scheme and flower shape that best complements your garden’s aesthetics.
3. Growth Height
Different tulip varieties have varying heights. Arrange taller varieties at the back of your flowerbeds and shorter ones in the front for a visually balanced arrangement.
Optimal Planting Time and Location
Tulips are typically planted in the fall to allow them to establish their roots before winter. Follow these guidelines for successful planting:
1. Planting Time
The best time to plant tulip bulbs is in late September to early November, before the first hard frost. This allows the bulbs to root well before winter sets in.
2. Sunlight Requirements
Tulips thrive in full sun to partial shade. Choose a planting location that receives at least 6 hours of direct sunlight daily for optimal growth and blooming.
3. Soil Conditions
Tulips prefer well-draining soil with a neutral to slightly acidic pH. If your soil is heavy or clayey, amend it with compost to improve drainage.
Planting Tulip Bulbs
Planting tulip bulbs correctly is essential for their successful growth and flowering. Follow these steps for proper bulb planting:
1. Prepare the Soil
Loosen the soil to a depth of about 12 inches and remove any weeds or debris. Work in a balanced fertilizer to provide essential nutrients for the growing bulbs.
2. Bulb Depth and Spacing
Plant tulip bulbs at a depth that is roughly three times their height. Space the bulbs about 4 to 6 inches apart to allow room for growth.
3. Proper Orientation
Place the bulbs in the soil with the pointed end facing upwards and the flat end downwards. This ensures that the emerging shoots will grow in the right direction.
Watering and Mulching
Proper watering and mulching are crucial to support the growth of tulip bulbs and the development of strong, healthy plants:
1. Initial Watering
After planting, give the area a thorough watering to help settle the soil and initiate root growth. Keep the soil consistently moist but not waterlogged.
2. Mulching
Apply a layer of organic mulch, such as straw or wood chips, to insulate the soil and regulate temperature fluctuations. Mulch also helps retain moisture and suppress weed growth.
Caring for Growing Tulips
As your tulips begin to grow, they require ongoing care to ensure optimal development and vibrant blooms:
1. Watering
Continue to water your tulips regularly, aiming to keep the soil evenly moist. Adjust the frequency based on weather conditions – more during dry spells and less during rainy periods.
2. Fertilization
Apply a balanced fertilizer once the shoots emerge, and again after flowering. This provides the necessary nutrients for healthy growth and helps prepare the bulbs for the following season.
3. Deadheading
After the tulips have bloomed, remove the spent flowers to prevent seed production. This encourages the plant to redirect its energy towards bulb development.
Handling Tulips after Blooming
Once your tulips have finished blooming, follow these steps to ensure the best results for the following year:
1. Leave the Foliage
Allow the foliage to turn yellow and wither naturally. The leaves are essential for replenishing the bulbs with energy for the next blooming season.
2. Avoid Cutting
Avoid cutting or braiding the leaves, as this can impede the bulbs’ ability to store nutrients effectively.
3. Controlled Watering
Reduce watering gradually as the foliage starts to die back. This helps prevent bulb rot and encourages dormancy.
Storing and Replanting Tulip Bulbs
If you’re interested in reusing tulip bulbs in subsequent years, follow these steps for storing and replanting:
1. Digging and Cleaning Bulbs
After the foliage has dried completely, carefully dig up the bulbs. Remove excess soil and debris, and gently separate any offsets (small bulbs that form alongside the main bulb).
2. Drying and Storing
Place the bulbs in a dry, well-ventilated area for a few weeks to allow them to fully dry. Store the bulbs in a cool, dry place with good air circulation, such as a mesh bag or a wooden crate.
3. Replanting
In the fall, replant the stored bulbs following the same guidelines as initial planting. Remember to incorporate organic matter into the soil and choose a different location in your garden to prevent disease buildup.
Conclusion
Cultivating tulip flowers at home can be a gratifying endeavor that rewards you with a burst of vibrant colors and the joy of witnessing the cycle of growth and renewal. By selecting the right tulip varieties, providing the optimal planting conditions, and caring for the bulbs throughout their growth cycle, you can create a breathtaking display that transforms your garden into a springtime oasis. Remember that gardening is a learning experience, and each season provides new insights to enhance your skills and enjoyment of this timeless practice.


