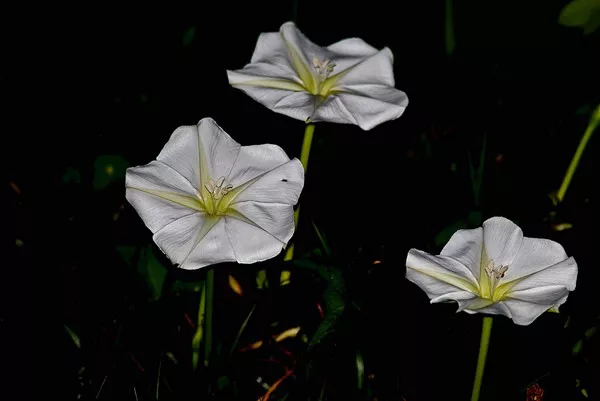
Moonflowers, scientifically known as Ipomoea alba, are captivating and enchanting flowering plants that have captured the hearts of gardeners and enthusiasts alike. Known for their large, luminous, and fragrant blossoms that unfurl under the moonlight, moonflowers add an air of mystery and beauty to any garden or landscape. However, cultivating these ethereal blooms from seeds can be a delicate process that requires careful attention and knowledge. In this guide, we will delve into the art of germinating moonflower seeds, from understanding their characteristics to providing optimal growing conditions and post-germination care.
Understanding Moonflower Seeds
Before embarking on the germination journey, it’s crucial to understand the characteristics of moonflower seeds. Moonflower seeds are often oval-shaped and relatively large, with a hard outer coat. This protective shell can make it challenging for water to penetrate and initiate the germination process. To enhance germination rates, it’s advisable to soften the seed coat before sowing.
1. Soaking Moonflower Seeds
Step 1: Preparing for Soaking
Gather moonflower seeds and a shallow container.
Boil water and let it cool to room temperature.
Step 2: Soaking Process
Place the seeds in the shallow container.
Gently pour the room-temperature water over the seeds until they are fully submerged.
Allow the seeds to soak for 12 to 24 hours. This process helps soften the seed coat, promoting faster germination.
Step 3: Completing Soaking
After soaking, carefully remove the seeds from the water. You might notice that the seed coat has absorbed water and expanded slightly.
2. Choosing the Germination Method
When it comes to germinating moonflower seeds, there are a few methods to choose from, each with its advantages. The two primary methods are soil germination and paper towel germination.
a. Soil Germination
Step 1: Selecting the Soil
Choose a well-draining potting mix rich in organic matter.
Fill a small seed tray or pots with the chosen potting mix.
Step 2: Planting the Seeds
Make a small indentation in the soil using your finger or a pencil.
Place the softened moonflower seed in the indentation.
Cover the seed with a thin layer of soil, about ¼ inch deep.
Step 3: Providing Optimal Conditions
Place the seed tray or pots in a warm and bright location, but shielded from direct sunlight.
Maintain consistent moisture by misting the soil or using a spray bottle. Avoid overwatering, as this can lead to rot.
Step 4: Germination and Growth
Germination should occur within 7 to 14 days, though it may take longer.
Once the seedling develops a few true leaves, it can be transplanted into a larger container or directly into the garden.
b. Paper Towel Germination
Step 1: Preparing the Materials
Moisten a paper towel, making sure it’s not dripping wet.
Place the soaked moonflower seeds on one half of the paper towel.
Step 2: Folding and Sealing
Fold the other half of the paper towel over the seeds, creating a seed-and-paper-towel sandwich.
Place the paper towel in a resealable plastic bag, leaving the bag slightly open for air circulation.
Step 3: Providing the Right Environment
Find a warm location for the bag, such as on top of a refrigerator or near a heat source.
Check the paper towel regularly to ensure it remains moist but not soaked.
Step 4: Transplanting Germinated Seeds
Once the seeds have sprouted small roots (usually within 7 to 10 days), carefully transplant them into prepared pots or directly into the garden.
Handle the delicate roots with care to avoid damage.
3. Post-Germination Care
Congratulations! Your moonflower seeds have successfully germinated. However, the journey doesn’t end here. Providing proper care after germination is vital for healthy seedling development and, eventually, robust blooming plants.
a. Transplanting Seedlings
If you started your seeds indoors or in pots, transplant the seedlings into their final outdoor location after the danger of frost has passed.
Choose a sunny spot with well-draining soil.
b. Watering
Keep the soil consistently moist but not waterlogged, especially during the seedling stage.
Water the plants at the base to prevent fungal diseases.
c. Support and Training
Moonflowers are climbing vines. Provide a trellis or support for them to climb as they grow.
Gently guide the young vines onto the support structure to encourage upward growth.
d. Fertilization
Feed your moonflower plants with a balanced, water-soluble fertilizer every 4-6 weeks during the growing season.
Avoid over-fertilization, as this can lead to excessive foliage growth at the expense of blossoms.
e. Pest and Disease Management
Keep an eye out for common garden pests like aphids and caterpillars. Use natural remedies or insecticidal soap to manage infestations.
Maintain good air circulation and avoid overcrowding to prevent fungal diseases.
Conclusion
Germinating moonflower seeds can be a rewarding and magical experience, offering the opportunity to witness the transformation of tiny seeds into enchanting, moonlit blooms. By following the steps outlined in this guide and providing attentive care throughout the growth process, you can create a garden filled with the splendor of these nocturnal treasures. Remember, patience and dedication are key to nurturing your moonflowers from seeds to stunning blossoms that will surely captivate anyone fortunate enough to behold them in their moonlit glory.


