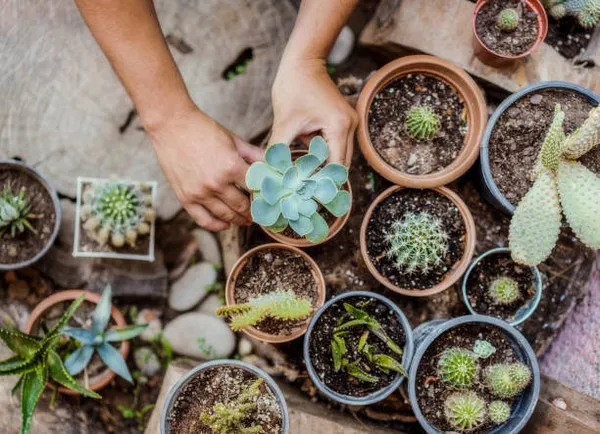
Succulents have gained immense popularity among plant enthusiasts, and hens and chicks (Sempervivum) are among the most beloved varieties. These resilient and attractive succulents are known for their rosette-like growth pattern, making them a favorite for both indoor and outdoor gardens.
Understanding Hens and Chicks Succulents
Before delving into the repotting process, it’s crucial to understand the unique characteristics of hens and chicks succulents. These plants belong to the Sempervivum genus and are characterized by their dense rosette clusters. The term “hens and chicks” is derived from their growth habit, where the main rosette, or “hen,” produces smaller offshoots known as “chicks.” These succulents are known for their resilience, drought tolerance, and ability to thrive in various environments.
The Significance of Repotting Succulents
Repotting is a vital aspect of succulent care, contributing to the overall well-being and longevity of the plants. Over time, succulents may outgrow their containers, deplete the nutrients in the soil, or face issues such as root rot. Repotting hens and chicks succulents becomes essential to provide them with fresh soil, ample space for growth, and to address any potential problems that may hinder their health.
Choosing the Right Time to Repot
Timing is crucial when it comes to repotting hens and chicks succulents. The ideal time to undertake this task is during the growing season, typically in spring or early summer. This allows the plants to recover and establish new roots before the dormant period in winter. Additionally, repotting during the active growth phase ensures that the succulents adapt quickly to their new environment.
Selecting the Right Container
When repotting hens and chicks succulents, choosing the right container is paramount. Opt for a container with adequate drainage holes to prevent waterlogging, a common issue that can lead to root rot in succulents. Additionally, consider the size of the container – it should provide enough room for the current size of the succulent and accommodate its potential growth over the next couple of years.
Preparing the Succulent for Repotting
Before initiating the repotting process, it’s essential to prepare the hens and chicks succulent. Water the plant a few days before repotting to ensure that the soil is slightly moist but not waterlogged. This facilitates the removal of the succulent from its current container and minimizes stress on the plant during the transition.
Gently remove the succulent from its current pot, taking care not to damage the leaves or roots. Inspect the roots for any signs of rot or disease, trimming away any damaged portions with clean, sharp scissors or pruning shears. This step is crucial for the overall health of the succulent and prevents the spread of potential issues to the new soil.
Choosing the Right Soil Mix for Succulents
The choice of soil is a critical factor in the success of repotting hens and chicks succulents. These plants thrive in well-draining soil that prevents water retention around the roots. A suitable succulent mix typically includes components such as coarse sand, perlite, and potting soil. The addition of these materials enhances aeration, prevents compaction, and ensures that excess water drains away swiftly.
Planting the Succulent in the New Container
Once the succulent is prepared and the soil mix is ready, it’s time to plant the hens and chicks in their new container. Place a layer of the prepared soil mix at the bottom of the container, ensuring that it covers the drainage holes. Position the succulent in the center, taking care to spread its roots evenly over the soil.
Fill the remaining space around the succulent with the soil mix, gently pressing it down to secure the plant in place. Leave a small gap between the top of the soil and the rim of the container to allow for watering without overflow. Take this opportunity to arrange any chicks around the main rosette, creating an aesthetically pleasing composition.
Watering and Care After Repotting
Proper watering is crucial in the post-repotting care of hens and chicks succulents. After transplanting, water the succulent sparingly to avoid overhydration. Allow the soil to dry out between waterings, as succulents are prone to root rot in consistently moist conditions. Gradually resume the regular watering schedule once the succulent has acclimated to its new environment, typically after a week or two.
Place the repotted succulent in a location with adequate sunlight. Hens and chicks thrive in bright, indirect light but can tolerate some direct sunlight. Ensure that the succulent receives at least six hours of sunlight per day to maintain its vibrant colors and compact growth habit.
Monitoring and Troubleshooting
Regular monitoring is essential to ensure the continued health of hens and chicks succulents after repotting. Keep an eye on the leaves for any signs of stress, such as wilting or discoloration. If issues arise, address them promptly by adjusting watering frequency, ensuring proper sunlight exposure, or addressing potential pests.
Pest infestations can occur, even in well-maintained succulents. Inspect the plant regularly for common pests such as aphids or mealybugs. If pests are detected, treat them using a mild insecticidal soap or neem oil, ensuring that the solution reaches all parts of the succulent.
Conclusion
In conclusion, repotting hens and chicks succulents is a crucial aspect of succulent care that contributes to their overall health and longevity. Understanding the unique characteristics of these plants, choosing the right time to repot, selecting an appropriate container, and using a well-draining soil mix are key components of the process. By following the steps outlined in this comprehensive guide, succulent enthusiasts can ensure the successful repotting of their hens and chicks, promoting vibrant growth and a stunning display in their indoor or outdoor gardens.


