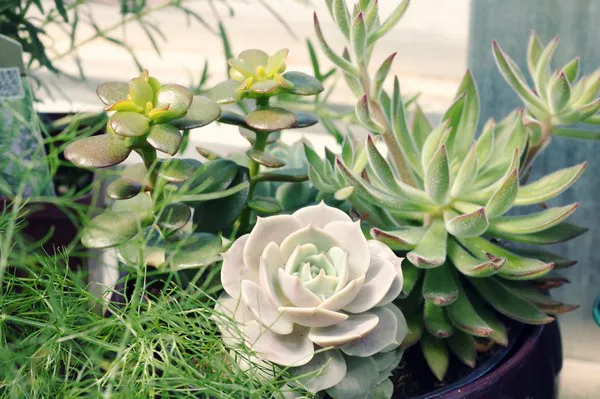
Succulents have gained immense popularity in recent years due to their unique aesthetic appeal and low maintenance requirements. Whether you’re a seasoned succulent enthusiast or a beginner looking to cultivate these resilient plants, understanding how to transfer succulents from one pot to another is a crucial skill. In this comprehensive guide, we will delve into the intricacies of succulent transplantation, providing you with step-by-step instructions, essential tips, and expert advice to ensure a seamless transition for your beloved succulents.
Understanding the Need for Transplantation
Before diving into the specifics of transferring succulents, it’s essential to recognize when your plants might require a change of pots. Over time, succulents can outgrow their containers, leading to issues such as overcrowded roots, reduced nutrient absorption, and stagnation in growth. Recognizing these signs early on allows you to take proactive measures, ensuring the continued health and vitality of your succulents.
Selecting the Right Time for Transplantation
Timing is crucial when it comes to transferring succulents. The ideal time for transplantation is during the growing season, typically in spring or early summer. This ensures that your succulents have ample time to establish their roots in their new environment before the dormant period in winter. Additionally, avoid transplanting during extreme weather conditions, as succulents may undergo unnecessary stress during the process.
Choosing the Right Pot
Selecting an appropriate pot is a critical factor in the success of succulent transplantation. Opt for a container with adequate drainage holes to prevent waterlogging, a common issue that can lead to root rot in succulents. The material of the pot is also crucial – terracotta pots are often recommended due to their porous nature, allowing excess moisture to evaporate. Ensure that the new pot is slightly larger than the current one, providing ample space for the succulent to grow.
See Also: How to start a succulent business?
Preparing the New Pot
Before transferring your succulent, it’s essential to prepare the new pot to create an optimal environment for growth. Start by adding a layer of well-draining succulent or cactus potting mix to the bottom of the pot. This specialized soil mix promotes proper aeration and drainage, preventing waterlogged conditions that can be detrimental to succulents. Additionally, you can mix in some perlite or sand to enhance drainage further.
Carefully Removing the Succulent
The actual process of transferring succulents begins with the careful removal of the plant from its current pot. Gently tap the bottom and sides of the pot to loosen the soil, making it easier to slide the succulent out. If the roots have densely packed the soil, you may need to run a knife along the inner edges of the pot to free the succulent. Once the succulent is loosened, carefully lift it out, supporting the base of the plant to minimize stress on the roots.
Examining and Pruning the Roots
With the succulent out of its current pot, take the opportunity to examine its roots. Healthy succulent roots are typically white or light brown, firm, and spread evenly throughout the soil. Trim any damaged or rotting roots using clean, sharp scissors or pruning shears. This step is crucial for promoting new root growth and preventing the spread of diseases to the fresh potting mix.
Positioning the Succulent in the New Pot
Now that the succulent and its roots are prepared, it’s time to position it in the new pot. Place the succulent in the center of the pot, ensuring that it sits at the same depth as it did in the previous container. Fill in the gaps with the prepared succulent potting mix, gently pressing it down around the plant to eliminate air pockets. Leave a small space at the top of the pot to facilitate watering without spillage.
Watering and Settling In
Once the succulent is securely positioned in the new pot, give it a thorough watering. This helps the soil settle around the roots and promotes the establishment of the plant in its new environment. However, be cautious not to overwater, as succulents are susceptible to root rot in soggy conditions. Allow the soil to dry out completely between waterings, maintaining the optimal balance for your succulent’s health.
Monitoring and Care After Transplantation
After the successful transfer of your succulent, ongoing care is crucial for its well-being. Place the newly potted succulent in a location with adequate sunlight, as most succulents thrive in bright, indirect light. Keep a watchful eye on the moisture levels in the soil and adjust your watering schedule accordingly. It’s normal for succulents to experience a period of adjustment after transplantation, so be patient and observant.
Troubleshooting Common Issues
Despite your best efforts, succulents may encounter challenges after transplantation. Overwatering, underwatering, and pests are common issues that can arise. Regularly inspect your succulents for signs of stress, such as yellowing leaves or wilting. Adjust your care routine based on the specific needs of your succulents, and consider using natural pest control methods if necessary.
Conclusion
In conclusion, the successful transfer of succulents from one pot to another is a skill that every enthusiast should master. By understanding the signs that indicate the need for transplantation, selecting the right time and pot, and following a careful step-by-step process, you can ensure the health and longevity of your succulents. Remember to prioritize the well-being of your plants during the adjustment period and stay vigilant for any potential issues that may arise. With the right knowledge and care, you can enjoy a thriving collection of succulents that adds beauty and greenery to your space.


