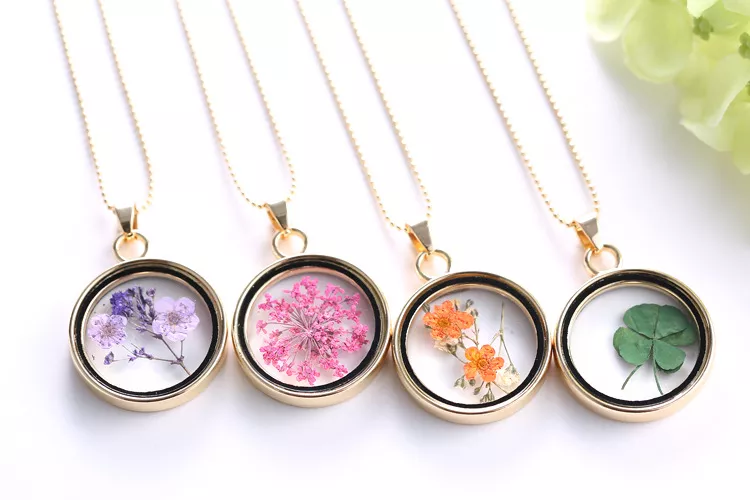
In the world of crafting, the marriage of nature and artistry has given rise to a unique trend – dried flower jewelry. Combining the delicate beauty of dried flowers with the elegance of jewelry design results in stunning pieces that are not only visually appealing but also carry a touch of nature’s timeless charm. In this comprehensive guide, we will explore the steps and techniques involved in transforming dried flowers into exquisite jewelry.
Understanding Dried Flowers
Before delving into the creative process, it is crucial to understand the characteristics of dried flowers. Drying flowers involves removing moisture from the blooms while preserving their shape and color. Common methods include air drying, pressing, and using desiccants. Choosing flowers with sturdy petals and vibrant colors is essential for creating durable and visually appealing jewelry.
Materials and Tools
To embark on the journey of making dried flower jewelry, gather the following materials and tools:
1. Dried flowers: Select a variety of flowers with different shapes, sizes, and colors. Roses, baby’s breath, and lavender are popular choices.
2. Resin: Opt for a high-quality, clear resin to encapsulate the dried flowers and provide durability and a glossy finish.
3. Jewelry findings: Purchase findings such as earring hooks, pendant bails, and ring blanks to turn the dried flowers into wearable pieces.
4. Silicone mold: Use a silicone mold in various shapes and sizes to create the desired jewelry forms.
5. Mixing cups and stirrers: Have disposable mixing cups and stirrers on hand for preparing and pouring resin.
6. Protective gear: Wear gloves and work in a well-ventilated area to protect yourself from resin fumes.
Step-by-Step Guide
Now, let’s delve into the step-by-step process of making dried flower jewelry:
1. Selecting and Preparing Dried Flowers
Begin by choosing dried flowers that complement each other in terms of color and size. Trim the stems, removing any excess material. Arrange the flowers in the desired design, considering the shape of the jewelry you intend to create.
2. Preparing the Resin
Follow the instructions on the resin packaging for the correct mixing ratio. Use disposable cups to measure and mix the resin thoroughly. Take care not to introduce air bubbles during the mixing process.
3. Pouring the First Resin Layer
Pour a thin layer of resin into the silicone mold, ensuring it covers the base evenly. Place the arranged dried flowers on top of this layer, adjusting their positions as needed. Use a toothpick or a small tool to position the flowers precisely.
4. Dealing with Air Bubbles
To eliminate air bubbles trapped in the resin, gently blow on the surface using a straw or use a heat gun on a low setting to release any trapped air. This step is crucial to achieving a clear and flawless final result.
5. Adding Additional Layers
Once the first layer has cured, typically after 24 hours, add subsequent layers of resin until the flowers are fully encapsulated. Allow each layer to cure before adding the next to prevent the risk of bubbles or uneven surfaces.
6. Demolding and Finishing Touches
Carefully remove the cured resin piece from the silicone mold. Trim any excess resin using a sharp craft knife, and use fine-grit sandpaper to smooth the edges. Attach the chosen jewelry findings using a strong adhesive or by embedding them in the resin during the casting process.
7. Assembling the Jewelry
Now that you have individual resin pieces adorned with dried flowers, assemble them into the desired jewelry items. Attach earring hooks for earrings, pendant bails for necklaces, or ring blanks for rings. Ensure all components are securely attached.
8. Sealing the Jewelry
For added protection and longevity, consider sealing the dried flower jewelry with a clear sealant or additional layers of resin. This step enhances the jewelry’s durability and preserves the colors of the dried flowers.
9. Caring for Dried Flower Jewelry
Advise those who wear your creations to handle them with care. Store the jewelry away from direct sunlight and extreme temperatures, and avoid exposing it to harsh chemicals or water. Providing proper care will ensure the longevity of these delicate pieces.
10. Personalizing Your Creations
One of the beauties of crafting dried flower jewelry is the opportunity to personalize each piece. Experiment with different flower combinations, resin tints, or even incorporating small mementos like tiny charms or glitter for a unique touch.
Conclusion
Creating dried flower jewelry is a captivating journey that seamlessly blends nature’s beauty with artistic expression. With the right materials, tools, and a touch of creativity, anyone can craft unique and stunning pieces that serve as wearable works of art. Whether you’re a seasoned crafter or a beginner, the steps outlined in this guide provide a comprehensive roadmap to help you embark on your own adventure in the world of dried flower jewelry crafting. Enjoy the process, embrace your creativity, and let nature’s timeless charm shine through your exquisite creations.


