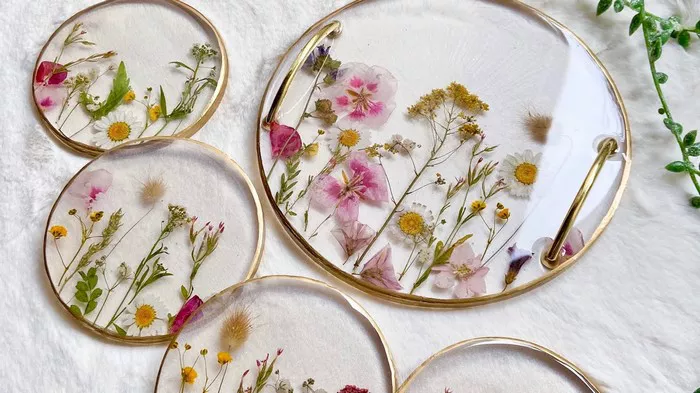
Resin flower coasters are a delightful and functional addition to any home, bringing a touch of nature-inspired elegance to your decor. Crafting these unique coasters allows you to showcase your creativity while adding a personal touch to your living space. In this comprehensive guide, we’ll walk you through the step-by-step process of making resin flower coasters, ensuring a rewarding and visually appealing DIY project.
Materials Needed:
Before diving into the crafting process, gather the necessary materials. Ensuring you have everything on hand will streamline the project and make the experience more enjoyable. Here’s a list of essential materials:
1. Resin: Choose a high-quality, clear casting resin suitable for coaster making.
2. Hardener: The resin hardener is a crucial component for the curing process.
3. Mold: Select silicone molds in various shapes and sizes for creating the coaster base.
4. Dried Flowers: Opt for dried flowers in different colors and shapes to add a natural and artistic element.
5. Mixing Cups and Stir Sticks: Use disposable cups and wooden stir sticks for accurate resin mixing.
6. Gloves and Safety Gear: Protect your hands and work in a well-ventilated area.
7. Release Agent: Prevent sticking by applying a release agent to the molds.
8. Heat Gun or Butane Torch: Eliminate air bubbles from the resin surface for a smooth finish.
9. Measuring Tools: Ensure precise measurements with graduated measuring cups.
10. Crafting Mat: Protect your work surface from spills and drips.
Step 1: Set Up Your Workspace
Create a dedicated and well-ventilated workspace for your resin flower coaster project. Cover the work surface with a crafting mat to catch any spills. Ensure the area is free from dust and debris, as these can mar the clarity of the resin.
Step 2: Prepare the Flowers
Select and arrange your dried flowers to create visually appealing designs for your coasters. Trim the flowers to fit the molds and remove any excess stems. Experiment with different layouts to find the most aesthetically pleasing arrangement.
Step 3: Mix the Resin
Follow the manufacturer’s instructions for your chosen resin to create a precise mixture. Measure equal parts of resin and hardener, and mix them thoroughly in a disposable cup. Stir slowly to minimize the introduction of air bubbles.
Step 4: Apply a Release Agent
To ensure easy removal of the coasters from the molds, apply a thin layer of release agent. Use a brush or a cotton swab to evenly distribute the agent, paying attention to corners and crevices.
Step 5: Pour the Base Layer
Pour a thin layer of resin into the molds, covering the bottom evenly. This layer serves as the base for your coaster and provides a smooth surface for arranging the flowers.
Step 6: Arrange the Dried Flowers
Gently place the dried flowers onto the resin base, creating a visually pleasing design. Experiment with different flower combinations and orientations to achieve the desired aesthetic.
Step 7: Pour Another Layer of Resin
Once the flowers are arranged to your satisfaction, pour another layer of resin over them. Ensure that the flowers are fully submerged in the resin to preserve their natural beauty.
Step 8: Eliminate Air Bubbles
To achieve a flawless finish, use a heat gun or butane torch to remove any air bubbles trapped in the resin. Move the heat source in a sweeping motion over the surface, being careful not to scorch the resin or overheat the flowers.
Step 9: Allow the Resin to Cure
Follow the recommended curing time provided by the resin manufacturer. Typically, this process takes 24 to 48 hours, during which the resin hardens and becomes durable. Be patient and resist the urge to touch or move the coasters prematurely.
Step 10: Demold the Coasters
Once the resin has fully cured, carefully demold the coasters. Flex the silicone mold to release the edges, and gently push from the bottom to pop the coaster out. If you encounter resistance, wait a bit longer before trying again.
Step 11: Sand and Polish
To achieve a professional-looking finish, lightly sand the edges of the coasters. Use a fine-grit sandpaper to smooth any rough edges, and then polish the surface with a polishing compound for a glossy shine.
Step 12: Seal the Coasters
For added durability and protection, consider sealing the coasters with a clear sealant. This step enhances the longevity of your resin flower coasters and safeguards them from daily wear and tear.
Step 13: Enjoy Your Handcrafted Coasters
With the final step completed, your resin flower coasters are ready to grace your home. Place them on coffee tables, side tables, or anywhere you’d like to add a touch of nature-inspired beauty. These coasters also make thoughtful and personalized gifts for friends and family.
Tips and Tricks:
1. Experiment with Color: Add a few drops of resin dye to create vibrant and colorful backgrounds for your coasters.
2. Incorporate Other Elements: Consider adding glitter, metallic flakes, or other decorative elements for a more personalized touch.
3. Layering Techniques: Create depth by pouring resin in layers, allowing each layer to partially cure before adding the next.
Conclusion
Crafting resin flower coasters is a creative and rewarding DIY project that allows you to infuse your living space with nature-inspired elegance. By following this comprehensive guide, you can confidently create stunning coasters that not only protect your furniture but also serve as unique pieces of functional art. Embrace the beauty of dried flowers, experiment with resin colors and techniques, and enjoy the satisfaction of showcasing your creativity through this delightful home decor project.


