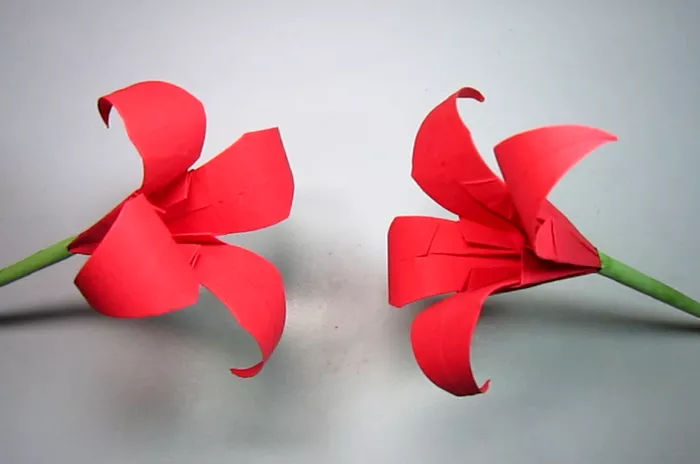
Origami, the ancient Japanese art of paper folding, has captivated minds and hearts for centuries with its simplicity, elegance, and infinite creative possibilities. Among the myriad of origami designs, the lily flower holds a special place, symbolizing purity, beauty, and tranquility. Crafting a lily flower through origami requires patience, precision, and a deep appreciation for the delicate balance between form and technique. In this comprehensive guide, we will explore step-by-step instructions, tips, and techniques to help you master the art of creating stunning lily flowers through origami.
Understanding the Basics of Origami
Before delving into the intricate folds of the lily flower, it’s essential to grasp the fundamental principles of origami. Origami, derived from the Japanese words “ori” (fold) and “kami” (paper), involves transforming a flat sheet of paper into various shapes and forms through precise folding techniques. The key elements of origami include:
1. Paper Selection: Choose thin yet durable paper for your origami projects. Traditional origami paper, known as “washi,” is ideal due to its lightweight and flexibility. However, you can also use colored or patterned paper to add visual interest to your lily flower.
2. Folding Techniques: Mastering basic folding techniques is crucial for creating clean and crisp folds in your origami creations. Common folds include valley folds (folding the paper inward) and mountain folds (folding the paper outward). Practice these folds until they become second nature.
3. Crease Precision: Accurate creases are essential for achieving symmetry and structure in your origami model. Use a bone folder or the edge of your fingernail to create sharp creases along the fold lines.
4. Patience and Persistence: Origami requires patience and attention to detail. Don’t be discouraged by initial setbacks; instead, view them as opportunities for learning and improvement.
Now that we’ve covered the basics, let’s embark on our journey to create exquisite lily flowers through origami.
Materials Needed
Before we begin folding, gather the following materials:
- Origami paper (preferably square and dual-sided)
- Scissors (optional)
- Glue (optional, for securing the final assembly)
Ensure you have a clean and spacious workspace to facilitate the folding process.
Step-by-Step Instructions
Follow these detailed instructions to craft a beautiful lily flower through origami:
1. Preparation: Start with a square sheet of origami paper, preferably with a different color or pattern on each side. If your paper is not already square, trim it into a square shape using scissors.
2. Valley and Mountain Folds: Begin by folding the paper in half diagonally, creating a triangle. Unfold the triangle and repeat the fold in the opposite direction, forming another triangle. These are valley and mountain folds, respectively.
3. Petal Folds: With the colored side facing down, bring the right corner of the triangle to meet the top corner, creating a smaller triangle. Repeat this step for the left corner, resulting in a diamond shape.
4. Inside Reverse Fold: Fold the top layer of the right side of the diamond inward along the crease line, creating a small triangle at the top. Repeat this fold for the left side.
5. Swivel Fold: Lift the top layer of the right triangle, and gently open it along the crease line. Press down to flatten, forming a petal shape. Repeat this fold for the left side.
6. Repeat Steps 3-5: Repeat steps 3 to 5 for the bottom half of the diamond, creating two additional petals.
7. Squash Fold: Carefully open one of the petals and squash it flat, aligning the edges along the center crease. Repeat this fold for the remaining petals, resulting in a symmetrical flower shape.
8. Final Assembly: To complete the lily flower, fold the bottom edges of each petal inward to form a more defined shape. Adjust the petals as needed to achieve balance and symmetry.
9. Optional: If desired, apply a small amount of glue to the base of the flower to secure the petals in place.
Congratulations! You have successfully crafted a stunning lily flower through origami. Experiment with different paper colors and sizes to create a bouquet of vibrant lilies.
Tips and Techniques
To enhance your origami skills and create lifelike lily flowers, consider the following tips and techniques:
1. Practice Makes Perfect: Origami mastery comes with practice. Set aside dedicated time each day to hone your folding skills and experiment with new designs.
2. Precision and Patience: Pay close attention to the accuracy of your folds and creases. Even minor deviations can impact the final result. Be patient and take your time to achieve perfection.
3. Experiment with Paper: Explore a variety of origami papers, including washi paper, metallic foil paper, and even recycled materials. Each type of paper offers unique textures and colors to enhance your creations.
4. Study Diagrams and Tutorials: Utilize origami diagrams, books, and online tutorials to learn new techniques and expand your repertoire of origami designs. Visual aids can provide valuable insights into complex folding sequences.
5. Join Origami Communities: Connect with fellow origami enthusiasts through online forums, workshops, and local meetups. Sharing experiences and exchanging tips with others can foster creativity and motivation.
6. Embrace Imperfection: Remember that origami is as much about the journey as it is about the destination. Embrace imperfections and learn from mistakes, as they often lead to unexpected discoveries and creative breakthroughs.
Conclusion
The art of lily flower origami embodies the essence of beauty, grace, and mindfulness. Through precise folds and delicate manipulations of paper, we can evoke the timeless allure of nature’s most exquisite blooms. Whether you’re a novice or seasoned origamist, the journey of crafting lily flowers through origami offers endless opportunities for creativity, exploration, and self-expression. So gather your paper, unleash your imagination, and let the petals unfurl as you embark on this enchanting origami adventure.


