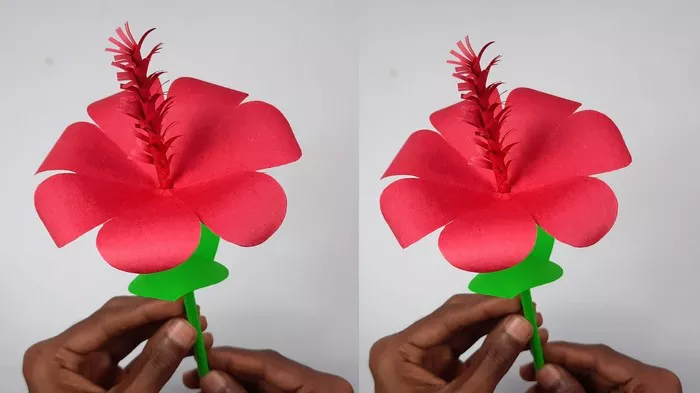
Paper crafts have always been a delightful way to express creativity and add a touch of beauty to our surroundings. Among the myriad of possibilities, crafting paper flowers stands out for its versatility and charm. In this comprehensive guide, we’ll delve into the intricate yet gratifying process of making paper hibiscus flowers, capturing the essence of these vibrant blooms through the art of paper manipulation.
Paper Hibiscus Flowers
Hibiscus flowers are known for their striking appearance, with their large, colorful petals and prominent stamens. Recreating these blossoms in paper form allows crafters to enjoy their beauty indefinitely, without worrying about wilting or seasonal availability. Whether used as standalone decorations, embellishments for gifts, or as part of larger craft projects, paper hibiscus flowers bring a touch of tropical elegance to any setting.
Materials Needed
Before diving into the crafting process, it’s essential to gather all the necessary materials. Here’s what you’ll need to make paper hibiscus flowers:
1. Colored craft paper in shades of red, pink, yellow, or white (for petals)
2. Green craft paper (for leaves)
3. Scissors
4. Pencil
5. Craft glue or hot glue gun
6. Floral wire or green pipe cleaners
7. Floral tape
8. Templates (optional)
Ensure that the craft papers you choose are of good quality and thickness, as this will affect the durability and appearance of your finished flowers.
Step-by-Step Guide
Now that you have your materials ready, let’s embark on the journey of creating stunning paper hibiscus flowers:
Step 1: Prepare the Petals
- Choose a colored craft paper for the petals. Red is a classic choice for hibiscus flowers, but feel free to experiment with other colors for a unique twist.
- Using a pencil, trace the petal template onto the craft paper. If you don’t have a template, you can freehand draw the petals or find printable templates online.
- Carefully cut out the petals using scissors. You’ll need several petals of varying sizes for each flower, so repeat this step as necessary.
Step 2: Shape the Petals
- To give the petals a lifelike appearance, gently curl the edges using your fingers or a round object like a pencil or dowel rod. This will add dimension and realism to your paper hibiscus flowers.
- Experiment with different curling techniques to achieve varying degrees of curvature in the petals. This will create a more natural and dynamic look when the flower is assembled.
Step 3: Construct the Flower Center
- Cut a small circle out of yellow or dark red craft paper to serve as the flower’s center.
- Optionally, add texture and dimension to the center by crumpling the paper slightly before gluing it in place.
Step 4: Assemble the Petals
- Arrange the petals around the flower center, starting with the largest petals on the outermost layer and gradually adding smaller petals towards the center.
- Secure each petal in place using craft glue or a hot glue gun, ensuring that they overlap slightly for a full and realistic look.
- Take your time with this step, adjusting the position of the petals as needed to achieve a balanced and aesthetically pleasing arrangement.
Step 5: Create the Stamens
- Cut several thin strips of yellow or dark red craft paper to serve as the stamens of the hibiscus flower.
- Using scissors, fringe the ends of each strip to mimic the delicate texture of real hibiscus stamens.
- Roll each strip tightly to form a slender tube, securing the end with a dab of glue to hold it in place.
Step 6: Attach the Stamens
- Carefully insert the rolled stamens into the center of the flower, positioning them amidst the petals.
- Use craft glue or a hot glue gun to secure the base of each stamen to the flower center, ensuring that they are evenly distributed and extend slightly beyond the petals for a realistic effect.
Step 7: Add the Leaves
- Cut leaf shapes out of green craft paper to accompany your paper hibiscus flowers.
- For added realism, use scissors to create veins and texture on the leaves before attaching them to the flower.
- Secure the leaves to the stem using craft glue or a hot glue gun, positioning them just below the flower to complete the look.
Step 8: Finishing Touches
- Once all the components are assembled, take a moment to admire your handiwork and make any final adjustments as needed.
- If desired, embellish your paper hibiscus flowers further by adding details such as dew drops, glitter, or metallic accents for a touch of sparkle and sophistication.
Step 9: Display and Enjoy
- Your paper hibiscus flowers are now ready to be displayed and admired! Arrange them in a vase for a stunning centerpiece, incorporate them into floral arrangements, or use them to adorn gifts, cards, and other craft projects.
- Experiment with different colors, sizes, and petal arrangements to create a diverse array of paper hibiscus flowers that reflect your personal style and creativity.
Conclusion
Crafting paper hibiscus flowers is a rewarding and enjoyable process that allows you to channel your creativity while celebrating the beauty of nature. Whether you’re a seasoned crafter or a novice enthusiast, this step-by-step guide provides all the information you need to create stunning paper hibiscus flowers that will brighten any space and occasion. So gather your materials, unleash your imagination, and let the beauty of paper blooms inspire you to create something truly extraordinary.


