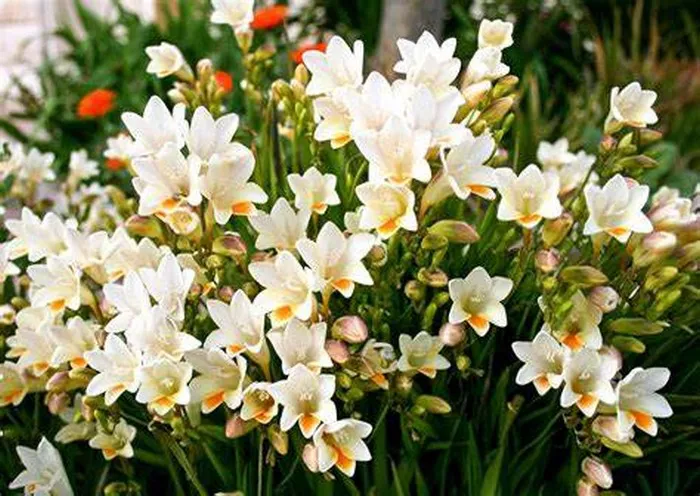
Freesias are renowned for their stunning, fragrant blooms that grace gardens and bouquets alike. However, once the flowers have faded, it’s time to consider the post-bloom care of freesia bulbs. Proper care after flowering can ensure healthy bulbs and abundant blooms in the next growing season. In this comprehensive guide, we will explore the various post-bloom care options for freesia bulbs, including digging up and storing them or leaving them in the ground, along with additional information to help you make informed decisions about caring for your freesias.
1. Post-Bloom Care Options:
After the vibrant display of freesia blooms fades, gardeners are faced with two primary options for the care of their bulbs: digging up and storing them or leaving them in the ground. Each option has its own set of advantages and considerations, depending on factors such as climate, available space, and personal preference.
2. Digging Up and Storing Bulbs:
For gardeners in regions where freesias are not winter hardy, digging up and storing the bulbs is a common practice to protect them from frost and cold temperatures. Here’s how to do it effectively:
Step-by-step instructions:
- Timing is crucial when digging up freesia bulbs. Wait until the foliage has yellowed and died back naturally, indicating that the bulbs have entered dormancy. This typically occurs in late spring or early summer.
- Use a garden fork or spade to gently lift the bulbs from the soil, taking care not to damage them. Shake off excess soil, but avoid removing the papery outer layers covering the bulbs.
- Once the bulbs are lifted, lay them out in a single layer in a dry, well-ventilated area to cure for a few days. This helps to toughen the outer skin and reduce the risk of rot during storage.
Curing and cleaning:
- After curing, gently remove any remaining soil or debris from the bulbs. Do not wash the bulbs, as excess moisture can lead to rot.
- Inspect the bulbs carefully for any signs of damage, disease, or pest infestation. Discard any bulbs that appear soft, moldy, or shriveled.
Proper storage conditions:
- Freesia bulbs should be stored in a cool, dry location with good air circulation. Ideal storage temperatures range from 35°F to 45°F (1.5°C to 7°C).
- Avoid storing bulbs in areas prone to temperature fluctuations or high humidity, as this can promote mold and rot.
- Consider placing the bulbs in mesh bags, paper bags, or shallow trays filled with peat moss or vermiculite to provide adequate ventilation and insulation during storage.
3. Leaving Bulbs in the Ground:
In regions with mild climates and well-draining soil, gardeners may choose to leave freesia bulbs in the ground year-round. Here’s what you need to know about this option:
Suitable climates:
- Leaving freesia bulbs in the ground is best suited for regions with mild winters and minimal risk of frost or freezing temperatures.
- Ensure that the soil is well-draining to prevent waterlogging, which can lead to rot and other bulb problems.
Winter protection:
- In colder climates, provide additional protection for freesia bulbs by applying a layer of mulch over the planting area. This helps to insulate the bulbs from freezing temperatures and prevents frost heaving.
- Mulch with materials such as straw, shredded leaves, or pine needles, applied to a depth of 2 to 3 inches (5 to 7.5 cm) around the bulbs.
Deadheading and foliage care:
- After the flowers have faded, remove spent blooms to prevent seed formation and encourage continued flowering.
- Allow the foliage to die back naturally, as this process helps to replenish the bulbs’ energy reserves for the next growing season. Avoid cutting back the foliage until it has turned yellow and withered completely.
4. Additional Information:
In addition to the primary care options outlined above, here are some additional tips and information for the post-bloom care of freesia bulbs:
Troubleshooting common problems:
- Keep an eye out for signs of bulb rot, fungal diseases, or pest infestations, such as soft, mushy bulbs, discolored foliage, or visible pests.
- Practice good garden hygiene by removing and disposing of any infected or infested plant material promptly to prevent the spread of disease.
Tips for replanting:
- If you’ve stored freesia bulbs over the winter, replant them in the garden once the soil has warmed up in the spring. Plant bulbs at a depth of 2 to 3 inches (5 to 7.5 cm) and space them 3 to 4 inches (7.5 to 10 cm) apart.
- Incorporate organic matter such as compost or well-rotted manure into the soil before planting to improve drainage and fertility.
Freesia varieties and specific needs:
- While most freesia varieties have similar care requirements, some may have specific preferences regarding soil type, sunlight exposure, or moisture levels.
- Consult the specific growing recommendations for the varieties you’re cultivating to ensure optimal conditions for healthy growth and abundant blooms.
Conclusion
In conclusion, proper post-bloom care is essential for maintaining the health and vitality of freesia bulbs, ensuring a spectacular display of blooms in the next growing season. Whether you choose to dig up and store the bulbs or leave them in the ground, following these guidelines will help you enjoy the beauty and fragrance of freesias year after year.


