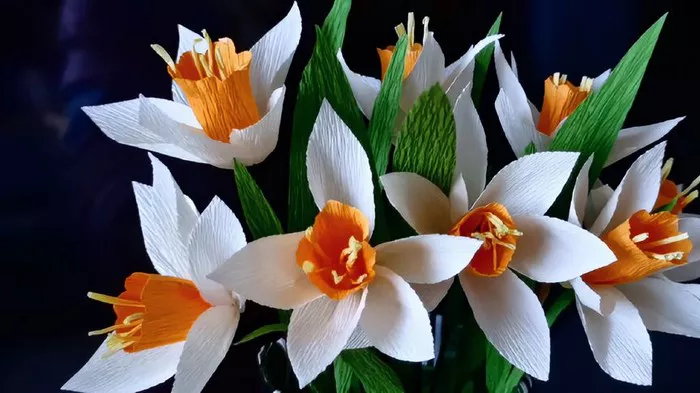
Gift wrapping paper, with its myriad of colors, patterns, and textures, isn’t just for wrapping presents. It can be transformed into beautiful, everlasting flowers that add a touch of elegance to any occasion. Whether you’re looking to create a bouquet for a special someone or embellish your home decor, crafting flowers from gift wrapping paper is a delightful and fulfilling endeavor. In this comprehensive guide, we’ll explore various techniques and tips for making stunning paper flowers that will leave everyone in awe.
Materials Needed
Before diving into the crafting process, gather the following materials:
- Gift wrapping paper: Choose a variety of colors and patterns to add visual interest to your flowers.
- Scissors: A sharp pair of scissors is essential for precise cutting.
- Floral wire: This will serve as the stem for your paper flowers.
- Floral tape: To secure the paper petals and stems together.
- Glue: A glue stick or craft glue works well for adhering paper layers.
- Pencil: For tracing and shaping petals.
- Templates: Optional but helpful for creating uniform petals.
- Embellishments: Ribbons, beads, or glitter for adding extra flair to your flowers.
Techniques for Making Paper Flowers
There are countless techniques for crafting paper flowers, each offering unique results. Here are some popular methods to get you started:
1. Accordion Fold Flowers:
- Begin by folding the gift wrapping paper accordion-style, creating even pleats.
- Cut out a petal shape, ensuring that one end of the petal includes all the folded layers.
- Unfold the paper to reveal a chain of connected petals.
- Gather the petals at one end and secure them with floral wire, then fan out the layers to create a full bloom.
- Use floral tape to wrap the stem and secure the petals in place.
2. Rolled Paper Roses:
- Cut long strips of gift wrapping paper, varying the width depending on the desired size of your rose.
- Roll one end of the paper strip tightly to form the center of the rose.
- Gradually twist and wrap the paper around the center, shaping it into a spiral to resemble rose petals.
- Secure the end of the strip with glue and release the rolled rose from the pencil.
- Fluff and adjust the petals to achieve a natural-looking rose bloom.
3. Layered Petal Flowers:
- Trace and cut out multiple layers of petals from different colors of gift wrapping paper, varying the size and shape for each layer.
- Stack the petal layers on top of each other, offsetting them slightly to create depth.
- Secure the layers together at the center with a dab of glue.
- Optional: Use a contrasting color of paper for the flower’s center or add a bead or button for extra detail.
- Attach a floral wire stem to the back of the flower and wrap with floral tape to complete the flower.
4. Origami Flowers:
- Explore the art of origami to create intricate and delicate paper flowers.
- Start with simple origami flower designs, such as the classic origami lily or tulip.
- Experiment with different folding techniques and paper sizes to achieve various flower shapes and styles.
- Origami flowers may require more patience and practice but result in stunning, intricate blooms.
5. Crepe Paper Flowers:
- While not technically gift wrapping paper, crepe paper offers a similar versatility and is ideal for crafting lifelike flowers.
- Cut petal shapes from crepe paper, using templates or freehand cutting.
- Gently stretch and shape the petals to add dimension and realism.
- Assemble the petals by gluing them onto floral wire stems, gradually building up layers to form a full flower.
- Finish by wrapping the stem with floral tape and adding any additional embellishments.
Tips for Success
Achieving professional-looking paper flowers requires attention to detail and practice. Here are some tips to help you along the way:
1. Choose the Right Paper: Opt for gift wrapping paper with a good weight and texture that will hold its shape when folded and manipulated.
2. Experiment with Colors and Patterns: Mix and match different colors and patterns of paper to create visually striking and unique flower arrangements.
3. Practice Precision Cutting: Invest in a sharp pair of scissors and take your time when cutting out petals and other flower components for clean, precise edges.
4. Be Patient: Crafting paper flowers can be time-consuming, especially when working on intricate designs. Take breaks as needed and enjoy the creative process.
5. Embrace Imperfection: Not every petal will be perfectly symmetrical, and that’s okay! Embrace the natural variations in your handmade flowers for a charming, organic look.
6. Add Detail: Don’t be afraid to embellish your paper flowers with additional details like glitter, beads, or painted accents to enhance their beauty.
7. Practice Makes Perfect: Like any craft, making paper flowers improves with practice. Don’t get discouraged if your first attempts don’t turn out exactly as planned—keep experimenting and refining your technique.
Conclusion
Crafting flowers from gift wrapping paper is a delightful and rewarding creative endeavor that allows you to bring a touch of beauty and elegance to any occasion. Whether you’re a seasoned crafter or a novice looking to explore a new hobby, making paper flowers offers endless opportunities for creativity and self-expression. With the techniques and tips outlined in this guide, you’ll be well on your way to creating stunning paper blooms that will be cherished for years to come. So gather your materials, unleash your imagination, and let the petals unfold!


